Tuesday 11 September 2012

Week #12 - What's in the Box - A Fond Farewell... for now!

Well its our final week of the Fenez Follies Farm CSA for the summer of 2012! The twelve weeks have flown by for us and I'm hoping that all our shareholders are happy with their experience this year! Despite the hail and the heat, we hope that you've enjoyed some of your favorite veggies as well as being exposed to some new foods and ideas. We've enjoyed feeding you and your family and hope that you might join us again next summer.

If anyone is interested in eggs, beef, pork or poultry... all will be available throughout the fall/winter. Eggs, of course, we have a steady supply of... we have some cuts of pork left (see our products page) and will have more in November. Beef is going in next week and so will be ready in two weeks. We will have another batch of chickens at the end of October. We still have whole turkeys available. As we get stuff in, we will share the news through our e-mail list and blog. You are all on our mailing list so no worries... unless you would prefer to not hear of these offerings and then you will need to let us know.

What's in the box this week:
Onions - both purple and white
Potatoes
Cucumber
Zucchini
Herbs (basil, parsley, chives)
Assorted peppers - Jalepeno pepper (green, tear drop shape) or Banana pepper (yellow, spear shaped) or Cherry Red Hot (small round red) or Chile peppers (round, thin) or Habeneros (small crumpled green/orange)
Tomatoes - both cherry and regular size
Melons - Honey Dew melon (white/green, smooth and round) or Cantaloupe (white/green, rough exterior, round)
Spaghetti Squash - oval shaped - creamy white to yellow color
Petit Pan Squash- orange pumpkin looking squash
Acorn Squash - green, acorn shaped squash
Butternut Squash - beige peanut shaped squash - (they are beige when they are ready - some of them are about a week away but will ripen up nicely.
(All the squash will keep quite some time - several months in fact)
Swiss Chard
Pumpkin - (Phantom variety)

While we welcome a change of pace from the weekly picking and packing of boxes, we will miss the weekly interaction we have had with each of you as you come to discover what goodies we have in store this week. One of the reasons we like to share our farm produce in this way (CSA) is that ability to get to know your customer (and vise versa) as oppose to the more anonymous interactions that might occur at a farmer's market or store. We love to hear your stories of trying new things as well as enjoying tried and true favorites. We hope that we can continue to feed you and hope to see you again soon! We are frequently in the city so let us know if we can get you eggs or meats throughout the cold months and dream of fresh veggies ready next summer!

Tuesday 4 September 2012

Week #11 - What's in the Box - This Week's Focus - Spaghetti Squash

Well September is here whether we want it or not! I personally love the fall season but just wish the month was not so busy! With the kids going back to school (all parents are heard cheering!) and the fall activities ramping up at the same time as all the harvest activities going on, its always a bit of a chaotic time.

Hope all of you CSA members have been lifting weights and doing some stretching as you will definitely need it to heft this weeks' box (not mention next week's!)

Speaking of next week, given that it will be your last box, I thought I would remind you to please bring some bags or your own box next week to take your veggies away with.  

What's in the box this week:
Onions
Potatoes
Cucumber
Zucchini
Herbs (cilantro, basil, parsley, oregano)
Assorted peppers - Jalepeno pepper (green, tear drop shape) or Banana pepper (yellow, spear shaped) or Cherry Red Hot (small round red) or Chile peppers (round, thin) or Habeneros (small crumpled green/orange)
Tomatoes - both cherry and regular size
Melons - Honey Dew melon (white/green, smooth and round) and Cantaloupe (white/green, rough exterior, round) (half share got one and full shares got both)
Spaghetti Squash - oval shaped - creamy white to yellow color (see this week's focus below for some ideas on what to do with this lovely item)
Swiss Chard
Carrots
Leeks
Pumpkin - (Sugar Pie variety - great for making pumpkin pie!) - Note: next week we have a bigger one for you!


This week's focus - Spaghetti Squash

The spaghetti squash (also called vegetable spaghetti, noodle squash or gold string melon is an oblong seed-bearing variety of winter squash. The fruit can range either from ivory to yellow or orange in color. The orange varieties have a higher carotene content. Its center contains many large seeds. Its flesh is bright yellow or orange. When raw, the flesh is solid and similar to other raw squash; when cooked, the flesh falls away from the fruit in ribbons or strands like spaghetti. Simply cook and use in place of spaghetti noodles with your favorite sauce - you will be amazed at how good it is!

Cutting Up Spaghetti Squash Before Cooking

Advantages: It cooks faster.
Disadvantages: Like any winter squash, hacking it up takes muscle and a sharp knife or cleaver. It's also a bit more work to scrape out the seeds and pulp when they are raw.

Method: Just get in there and cut it in half (lengthwise) or quarters. You don't want to cut it up too small unless you want short strands. Scrape out the seeds and pulp as you would with any squash or pumpkin. Bake rind side up about 30 to 40 minutes at 375 F.
Microwave 6 to 8 minutes (let stand for a few minutes afterwards)
Boil 20 minutes or so.

Separate strands by running a fork through in the "from stem to stern" direction.

Cooking Spaghetti Squash Whole

Advantages: It's easier.
Disadvantages: It takes longer to cook, and you need to watch out for burns when removing the pulp and seeds.

Method: Pierce the squash several times with a sharp knife. (Do this especially if you're microwaving it, or you may end up with a "Squash Explosion.")

Bake about an hour in the oven at 375 F.
Microwave 10 to 12 minutes, then let stand for 5 minutes or so afterward to finish steaming.
Boil for half an hour or so.
Slow Cooker/Crock Pot: Put it in with a cup of water and let it go on low all day (8 to 10 hours).

When done, cut open "at the equator" (not lengthwise), remove seeds and pulp (I use tongs and an oven mitt -- it is HOT) and separate strands with a fork.

Did You Know? Any squash seeds can be roasted just like pumpkin seeds (pumpkin is a kind of squash). They are low-carb, nutritious, and delicious:

Spaghetti Squash Storage Tip

Like pumpkin and other winter squashes, whole uncooked spaghetti squash is best stored between 50 to 60 degrees, and will last up to six months this way. If you have a room in your home that isn't well-heated, maybe you can use some space in it as a "root cellar" to store onions, squash, apples, and the like. On the other hand, spaghetti squash will keep several weeks at room temperature.

Enjoy!

Tuesday 28 August 2012

Week #10 - What's in the box - This week's focus - Butternut squash

It's Week #10 and we are at the end of August - Wow, this summer has flown by! This is the time of year in which you can spend picking produce pretty much on a full time basis and still have more to pick when you are done!

Given the heat and the excess flies - we've been bringing the veggies inside the house to store and keep cool. Good thing we have a big house as they have almost taken over most of the living room!

What's in the box this week:
Onions
Potatoes
Cucumber
Zucchini
Herbs (cilantro, basil, parsley, chives)
Assorted peppers - Jalepeno pepper (green, tear drop shape) or Banana pepper (yellow, spear shaped) or Cherry Red Hot (small round red) or Chile peppers (round, thin) or Habeneros (small crumpled green)
Tomatoes - both cherry and regular size
Assorted melons - Honey Dew melon (white/green, smooth and round) or Cantaloupe (white/green, rough exterior, round)
Assorted Squash - Butternut squash (long neck, round base, yellow/green) or Patty Pan squash (orange/yellow, looks like a bit like a small pumpkin)
Swiss Chard
Kohlrabi
Leeks


This week's focus - Butternut Squash


Butternut squash also known in Australia and New Zealand as butternut pumpkin, is a type of winter squash. It has a sweet, nutty taste similar to that of a pumpkin. It has yellow skin and orange fleshy pulp. When ripe, it turns increasingly deep orange, and becomes sweeter and richer. It grows on a vine.

Butternut squash is a fruit that can be roasted, toasted, puréed for soups, or mashed and used in casseroles, breads, and muffins.

It is a good source of fibre, vitamin C, manganese, magnesium, and potassium. It is also an excellent source of vitamin A and vitamin E.
The fruit is prepared by removing the skin, stalk and seeds, which are not usually eaten or cooked. However, the seeds are edible, either raw or roasted and the skin is also edible and softens when roasted. One of the most common ways to prepare butternut squash is roasting. To do this, the squash is cut in half lengthwise, lightly brushed with cooking oil, and placed cut side down on a baking sheet. It is then baked for 45 minutes or until it is softened. Once roasted, it can be eaten in a variety of ways as outlined above.


PAUL'S FAMOUS BUTTERNUT SOUP (serves 6 as a starter)

1 fresh butternut squash, peeled, seeded and cubed
1 large onion, chopped
2 cloves garlic, crushed
2 cups of chicken stock
Half a cup cream
1 tsp curry powder (as hot as you like)
A squirt of Worcestershire sauce
Salt and black pepper


1. Toss the chopped onion and garlic in a pot and sauté, don't burn or caramelise. They must be translucent but still white.
2. Add the peeled butternut and chicken stock and bring to the boil.
3. When the butternut is soft, mash (as in MASH, don't liquidise or pulverise!).
4. Add the other ingredients and stir.
5. Season to taste with salt and pepper.


Enjoy!

Tuesday 21 August 2012

Week #9 - What's in the Box - This Week's Focus - Tomatoes - Summer's Heavenly Fruit

It's Week #9 of our CSA share and the boxes of goodies are getting downright heavy! They are packed full with tomatoes, squash, melons and corn! (along with other goodies) Most of the plants have re-bounded fairly well from the storm a few weeks ago and our re-seeded greens (lettuce/spinach) should be ready shortly.

As mentioned last week, our turkeys are ready this week. So if you are looking for a tasty turkey for your Thanksgiving meal, just let us know. We have them frozen and ready for you! (reserve early as we sell out!) This year our turkeys range from 14-19 llbs and we are again selling them for $2.99/llb.

As usual we have zucchini to spare (there is already some in everyone's box), so short of dropping it on people's doorsteps, ringing the bell and running away.... we will bring some to the pick up times and if you want more - feel free to grab some.

The squash that you will find in your boxes will keep for a fairly long time so feel free to save them if you aren't ready to eat right away.

What's in the box this week:
Onions
Potatoes
Cucumber
Zucchini
Herbs (cilantro, basil, parsley, chives)
Assorted peppers - Jalepeno pepper (green, tear drop shape) or Banana pepper (yellow, spear shaped) or Cherry Red Hot (small round red) or Chile peppers (round, thin)
Tomatoes - both cherry and regular size
Assorted melons - Honey Dew melon (white/green, smooth and round) or Cantaloupe (white/green, rough exterior, round)
Corn
Cabbage (purple) - please soak your cabbage in water.
Carrots
Assorted Squash - Butternut squash (long neck, round base, yellow/green) or Patty Pan squash (orange/yellow, looks like a bit like a small pumpkin)
Swiss Chard
This week's focus - Tomatoes - Summer's Heavenly Fruit!

That's right, did you know that tomatoes are actually a fruit and not a vegetable? To me it doesn't matter how you categorize it, they are delicious! There is nothing better than a garden fresh tomato, sliced thickly and eaten with a bit of salt and mayo.... but that being said ... there are hundreds of other yummy ways to use and consume tomatoes! Put them in a salad, make salsa or fresh soup, make tomato sauce or paste, put them in a sandwich (wonderful with avocado!), use them in pasta sauces, on a pizza, grill them, roast them with basil and olive oil, mix them with sweet corn, garlic and vinegar for a wonderful salad, skewer the cherry tomatoes with a toothpick and cube of cheese for a quick appetizer.... I could go on! Whatever way you like your tomatoes... enjoy them!

Tuesday 14 August 2012

Week #8 - What's in the Box - This week's focus - Honeydew Melon!

It's Week #8 and we are feeling a lot better as plants are bouncing back from the hail and the cooler weather is helping us all cope a bit better!

We were very worried about our melons and whether they would survive the hailstorm, however you will find a slightly dented but otherwise yummy honey dew melon in the box - with cantaloupe to follow next week.

The tomatoes are ready as well! They suffered more damage than we thought but they taste wonderful even though some of them look a bit damaged.

Also wanted to mention that our turkeys will be ready on August 20th if you are interested in ordering any?

What's in the box this week:
Swiss Chard
Beans
Kohlrabi
Onions and Leeks
Potatoes
Cucumber
Zucchini
Herbs (cilantro, basil, parsley)
Radishes
Jalepeno pepper (green) and/or Banana pepper (yellow)
Parsnips
Turnip (put extra in Dana's box ;)
Tomatoes - both cherry and regular size
Honey Dew melon

This week's focus - Honey Dew Melon:

Honeydew melon is a variety of Muskmelon that originated in France and is considered the sweetest of all melons.

Storage:
Uncut Honeydew melon can be kept at room temperature for two to four days or until ripe. Ripe Honeydews can be refrigerated for an additional 5 days. Cut melons should be placed in a covered container and refrigerated for no more than three days. Keep in mind that Honeydws have a strong odor that will saturate other foods.

Preparation

Wash honeydew in warm soapy water prior to cutting to eliminate impurities on the rind that could be transferred from the knife to the melon's flesh. Next, slice the Honeydew in half and remove the seeds and strings. Melons can be cut into halves, quarters, wedges, cubes, or scooped into balls with a melon baller. Most melons will benefit from a squeeze of lemon or lime juice to enhance the flavor and served at room temperature.

Enjoy!

Tuesday 7 August 2012

Week #7 - What's in the Box..... this week - re-planting and re-framing!

Week #7 of our CSA finds us re-planting and re-framing.... with the hail damage last week, we have re-seeded some greens in hopes that we can quickly regain some of what is lost. Our seedlings are already up and we are watching them carefully and cheering them along.


In the re-framing department....we've taken the hail damaged green tomatoes that were scattered all around (don't worry there is still plenty good ones on the plants!) and turned it into Green Tomato Salsa (or Hail Salsa as I'm calling it!). As Florence said... if the world hands you lemons... make some lemonade! We made salsa instead!

There was enough to share with everyone, so you will all find a small sampling of Hail Salsa in your box today. I did not pressure can this (its so yummy - you need to eat right away) so please store in the fridge until you eat it.

What's in the box this week:
Carrots
Swiss Chard
Beans
Kohlrabi
Onions and Leeks
Potatoes
Cabbage
Cucumber or Zucchini
Herbs (cilantro, basil, parsley, oregano, chives)
Radishes
Kale
Jalepeno pepper
Parsnips
Beets
Hail Salsa

Thought I would include the recipe for the "Hail Salsa" I used... so you know what's in it and in the event you ever find yourself with an excess of green tomatoes.

Makes about 3 pints
Recipe may be doubled; increase cooking time by 10-15 minutes

Salsas are quite forgiving, so don't be afraid to adapt this recipe to what your end-of-the-season garden or farmers' market has to offer. Any type of tomato can be used, and you can mix and match varieties. Paste, or plum, tomatoes will require less cooking time since they're meatier and have less juice.

A touch of red on a few of the tomatoes is fine, as long as they're still very hard. Fully ripe tomatoes, though, will give your relish a completely different flavor and consistency. Partially green sweet red peppers can also be used, and you can adjust the amount of jalapeno peppers to suit your taste, or leave them out entirely.
2 lb. green tomatoes, cored and chopped
1 lb. white or yellow onions, chopped
3/4 lb. sweet red peppers, cored and chopped
1/2 lb. tart cooking apples, such as Granny Smith, cored and chopped
6 garlic cloves, finely chopped
1 cup 5% acidic organic raw apple cider vinegar (or less, see note below)*(I used about 50% of the recommended amount as I wasn't canning it)
1 Tablespoon kosher or sea salt
4 jalapeno peppers, cored, seeded if desired, and finely chopped
2 Tablespoons chopped cilantro
1 teaspoon ground cumin (optional)

Combine the tomatoes, onions, peppers, apples, garlic, vinegar, and salt in a large, nonreactive pot and bring to a boil. Reduce the heat and simmer, uncovered, stirring occasionally, until thickened, about an hour.

Stir in the jalapenos, cilantro, and cumin and simmer for 5 more minutes. Carefully purée the mixture using a stick immersion blender or in a traditional counter top blender, in batches if necessary, until still somewhat chunky. Do not overmix; you don't want it smooth.

This green tomato relish will keep in the refrigerator for several weeks.
If canning, return the puréed relish to a boil, then ladle the hot mixture into hot jars, leaving 1/4-inch head space. Process 15 minutes in a boiling water canner. Store in a cool, dark place for up to a year.


Hope you are able to "re-frame" your challenges into something tasty!

Tuesday 31 July 2012

Fenez Follies CSA - Week #6 - What's in the Box - This Week's Focus - Summer Squash


It's week #6 and we officially have the longest heat wave since 1936... add to that the hail storm that blew through the farm on Sunday and you could surmise that the stress level on the farm is a little high!

 
Most of the more tender large leaf plants took a beating (melons, cucumbers, squash, greens, etc), but some of the plants are already beginning to recover despite the gaping holes in their leaves. You'll find a few dents and scrapes in your veggies and a lot less greens until we can recover from this. Welcome to farming!


What's in the box this week:
Carrots
Broccoli
Swiss Chard (a bit battered by hail)
Beans
Zucchini
Kohlrabi
Onions and Leeks
Potatoes
Cucumber
Herbs (cilantro, basil, parsley)
Summer Squash
Radishes

This week's focus? Summer Squash (the yellow pumpkin shaped veggie)
The word “squash” is derived from “askutasquash,” which literally means “a green thing eaten raw” in the language of the Nahahiganseck Sovereign Nation. The squash is versatile. While some require cooking, others, like zucchini, can be prepared in every conceivable way: raw, sautéed, grilled, steamed, boiled, broiled, baked, fried, microwaved or freeze-dried. Easily puréed for soups, cakes, pies and quick breads, it also can be spiced and added to rice pilafs, cubed and grilled on skewers, added to stews and made into famous dishes like ratatouille and pumpkin pie. Served alone or as an side dish, the diverse flavors of squash lend itself to any occasion.

Some advice on storing squash:
  • Avoid storing squash near apples, avocados or passionfruit, all of which are are natural ripening agents that release ethylene gas. While they are great to throw into a paper bag to aid the ripening process of other fruits like pears, bananas and tomatoes (and to quicken plant flowering), they only discolor and decay zucchini and other dark green squash.
Simple Sauteed Squash
1 tablespoon extra-virgin olive oil
2 tablespoons butter
1/2 red bell pepper, chopped
2 small to medium yellow squash, sliced
Salt and pepper
2 tablespoons chopped parsley leaves
2 tablespoons chopped chives or 2 scallions, optional


Preheat skillet over medium high heat. Add oil, then butter. When butter melts, add red peppers and squash. Saute 12 to 14 minutes until squash is tender. Add salt, pepper and parsley. Add chives or scallions if you would like a layer of light onion flavor on the dish as well.
Enjoy!

Tuesday 24 July 2012

Fenez Follies CSA - Week #5 - What's in the Box - This week's focus - Zucchini - a vegetable or a dessert?

It's week #5 and the heat continues. The lettuce and spinach are bolting but the melons are happy! We have lots of green tomatoes on the plants so looks promising for you tomato lovers!

We are a bit distracted due to a cattle escape - so if you are heading out our way and have some time on your hands for a cattle rescue - let us know! :) It will likely require all hands to rustle Gilbert and Grace out of the neighbouring corn field!

Many of you will be happy to find fresh garden potatoes in this week's box! We had our favorite summer supper the other day - fresh beans and potatoes smothered in butter - nothing else needed! Yum!

What's in the box:

Carrots
Cauliflower and/or Broccoli
Kale
Swiss Chard
Beets
Peas
Beans
Zucchini
Kohlrabi
Onions and Leeks
Potatoes
Cucumber
Herbs (dill, basil, parsley)

This week's focus? Zucchini - a vegetable or a dessert?

Most of the zucchini's you will find in the boxes are on the bigger size - perfect for turning them into our favorite dessert!  Below I've revealed a Fenez Family trade secret - Grandma Fenez's Chocolate Zucchini cake! Our kids ate it for years before they realized that there was actually vegetables in it!


Just shred the zucchini using a cheese grater and away you go!  (of course you could also use it to make some fabulous zucchini chips or simply eat raw alone or in a salad!)

Grandma Fenez's Chocolate Zucchini Cake

1/2 cup soft margarine
1/2 cup vegetable oil
1 3/4 cup white sugar
2 eggs
1 tsp vanilla
1/2 cup sour milk (add a tsp of vinegar or lemon juice to milk to make it sour)
2 1/2 cups flour
4 tablespoons cocoa
1/2 tsp baking powder
1 tsp baking soda
1/2 tsp cinnamon
1/2 tsp cloves
2 cups finely diced or shredded zucchini
1/2 cup of chocolate chips

Cream margarine, sugar and oil.  Add eggs, milk and vanilla, beat well.  Mix dry ingredients in a separate bowl and then add to mixture, beat well. Stir in zucchini. Spoon into greased and floured 9 x 13 inch pan. Sprinkle with chocolate chips, bake at 325 degrees for 40-45 minutes. Needs no frosting.

Enjoy! (Thanks Grandma for sharing the recipe!)


Tuesday 17 July 2012

Week #4 - What's in the Box - This Week's Focus - Kohlrabi


Another hot week but at least we got a bit of rain on Sunday! The veggies are very happy with the cooler temperatures and the bit of moisture. (and so are we!). Some of you have been asking about our potatoes. We had some wind damage a few weeks ago and the plants are trying to recover thus not putting a lot of energy into the potatoes (more into the plant). But not to worry, a bit more time and everyone will be enjoying the heavenly taste of fresh potatoes from the garden!

What’s in the box:
Carrots
Broccoli
Kale
Swiss Chard
Romaine or Butternut Lettuce
Mixed Greens
Beets
Basil
Peas (you can eat like snap peas – pod and all!)
Zucchini
Kohlrabi
Cauliflower
Beans
 
This week’s focus? Kohlrabi

This week in your box you will find a round pale green vegetable (looks a bit like sputnik) that some of you might not be familiar with. Also known as the German turnip (its OK ... Dana it doesn't taste like turnip!). Kohlrabi is in the brassica family (cabbage, broccoli, cauliflower, kale, brussel sprouts) and tastes similiar to a broccoli stem or cabbage heart but milder and sweeter. Some people have suggested it tastes a bit like an apple!

Kohlrabi can be eaten raw as well as cooked. Raw - simply peel and slice and eat - also great in a salad. (you can also eat the leaves)

You will find numerous recipes on the internet on how to cook Kohlrabi and it is often found in Indian cuisine.

Below I've included a very simple recipe for Roasted Kohlrabi:


Ingredients

  • 4 kohlrabi bulbs, peeled
  • 1 tablespoon olive oil
  • 1 clove garlic, minced
  • salt and pepper to taste
  • 1/3 cup grated Parmesan cheese

Directions

  1. Preheat an oven to 450 degrees F (230 degrees C).
  2. Cut the kohlrabi into 1/4 inch thick slices, then cut each of the slices in half. Combine olive oil, garlic, salt and pepper in a large bowl. Toss kohlrabi slices in the olive oil mixture to coat. Spread kohlrabi in a single layer on a baking sheet.
  3. Bake in the preheated oven until browned, 15 to 20 minutes, stirring occasionally in order to brown evenly. Remove from oven and sprinkle with Parmesan cheese. Return to the oven to allow the Parmesan cheese to brown, about 5 minutes. Serve immediately.
Enjoy!

Tuesday 10 July 2012

Fenez Follies CSA Week #3 – What’s in the box? and How to store your vegetables without plastic!

Yikes it’s hot out there. In this kind of weather, you learn to get up early and work in the early mornings and late evenings! Thank goodness the mosquitoes don’t like this heat as well!  Our pump is getting a workout, trying to keep up on the watering.

What’s in the box:

Carrots
Broccoli
Kale
Swiss Chard
Romaine Lettuce
Mixed Greens
Beets
Mixed Herbs (Basil, Cilantro, Dill, Parsley)
Peas (you can eat like snap peas – pod and all!)
Zucchini

This week’s focus? How to store/keep veggies?

We pick your vegetables within hours of dropping them off, so you can’t get much fresher and certainly eating them right away is one option of course! However, if you are hoping to keep some of that goodness for later, we thought we could share some tips for how to store these goodies (without using a lot of plastic). These tips come from the Berkley Farmer’s Market which prides itself on being a Zero Waste market. Check out the full document here, but we’ve provided the tips you need to store this week’s box below for your convenience:

Basil – is difficult to store well (so use it asap). Basil does not generally like to be cold or wet for that matter. The best method is a airtight container/jar loosely packed with a small damp piece of paper towel inside – left out on a cool counter.

Beets – cut the tops off to keep beets firm, (be sure to keep the greens) leaving any top on root vegetables draws moisture from the root, making them lose flavor and firmness. Beets should be washed and kept in and open container with a wet towel on top.

Beet greens – place in an airtight container with a little moisture.

Broccoli – place in an open container in the fridge or wrap in a damp towel before placing in the fridge.

Carrots – cut the tops off to keep them fresh longer. Place them in a closed container with plenty of moisture, either wrapped in a damp towel or dunk them in cold water every coupld of days if they’re stored that long.

Cauliflower – will last a while in a closed container in the fridge, but they say cauliflower has the best flavor the day it picked.

Greens – remove any bands, twist ties, etc. most greens must be kept in an air tight container with a damp cloth – to keep them from drying out. Kale and chard do well in a cup of water on the counter or fridge.

Herbs – a closed container in the fridge to keep up to a week. Any longer might encourage mold.

Lettuce – keep damp in an airtight container in the fridge.

Snap peas – refrigerate in an open container.

Zucchini – does fine for a few days if left on a cool counter, even after cut. Wrap in a cloth and refrigerate for longer storage.

Enjoy!


Wednesday 4 July 2012

Week #2 Fenez Follies Farm CSA – What’s in the box? This week’s featured vegetables – Swiss Chard

Sometimes you need to be careful what you wish for…. We wanted some heat – well boy did we get some…now we want some rain. (I know, we farmers are never happy!). Anyway this week we have a few new items, thanks to the heat!

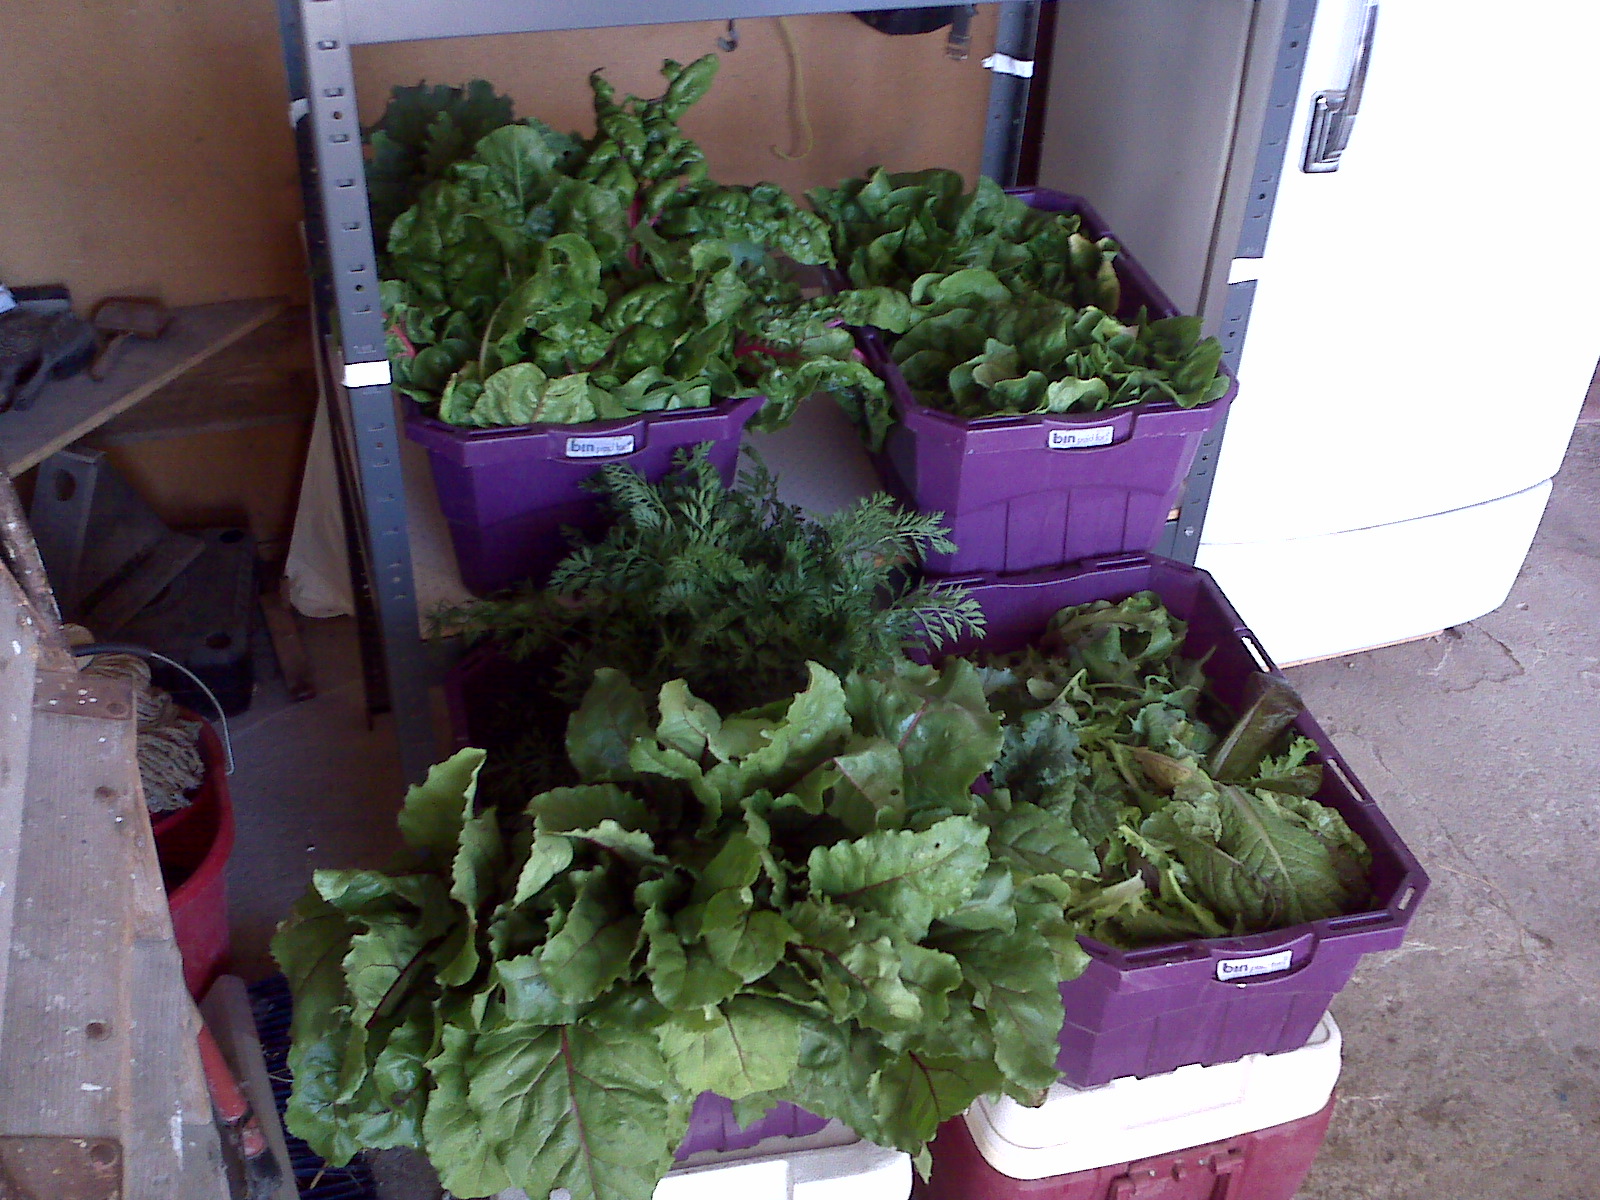
What’s in this week's box:

Carrots
Broccoli
Kale
Swiss Chard
Butternut Lettuce
Mixed Greens
Beets
Radish
Mixed Herbs (Thyme, Basil, Cilantro, Oregano, Dill)


This week’s focus on food?  Chard

Chard is a leafy green vegetable often used in Mediterranean cooking. While the leaves are always green, chard stalks vary in color. Chard has been bred to have highly nutritious leaves at the expense of the root (which is not as nutritious as the leaves). Chard is, in fact, considered to be one of the healthiest vegetables available and a valuable addition to a healthy diet (not unlike other green leafy vegetables).


Chard is a member of the beet family – also referred to as chenopods. Chard is also known by many common names such as Swiss chard, silverbeet, perpetual spinach, spinach beet, crab beet, bright lights (due to the bright and vivid spring colors when they are cooked or provided as a medley of vegetables), seakale beet, and mangold.

Chard can be harvested while the leaves are young and tender, or after maturity, when they are larger and have slightly tougher stems. Raw chard is extremely perishable.
Chard has shiny, green, ribbed leaves, with stalks that range from white to yellow to red, depending on the type.

Fresh young chard can be used raw in salads. Mature chard leaves and stalks are typically cooked or sauteed: their bitterness fades with cooking, leaving a refined flavor which is more delicate than that of cooked spinach.
Swiss chard is high in vitamins A, K, and C with a 175 g serving containing 214%, 716%, and 53%, respectively, of the recommended daily value. It is also rich in minerals, dietary fiber and protein.

Swiss Chard Recipe
Ingredients
·  1 large bunch of fresh Swiss chard
·  1 small clove garlic, sliced
·  2 Tbsp olive oil
·  2 Tbsp water
·  Pinch of dried crushed red pepper
·  1 teaspoon butter
·  Salt
Method
1 Rinse out the Swiss chard leaves thoroughly. Remove the toughest third of the stalk, discard or save for another recipe (see below). Roughly chop the leaves into inch-wide strips.
2 Heat a saucepan on a medium heat setting, add olive oil, a few small slices of garlic and the crushed red pepper. Sauté for about a minute. Add the chopped Swiss chard leaves. Cover. Check after about 5 minutes. If it looks dry, add a couple tablespoons of water. Flip the leaves over in the pan, so that what was on the bottom, is now on the top. Cover again. Check for doneness after another 5 minutes (remove a piece and taste it). Add salt to taste, and a small amount of butter. Remove the swiss chard to a serving dish.

SWISS CHARD STEMS

Do the following:
1. Boil until tender
2. Chop into small pieces
3. Mix Tahini (sesame seed paste) or in a pinch and out of tahini, use peanut butter, lemon juice, a piece of crushed garlic and a little water, salt and pepper. This should be a pourable sauce. Proportions are up to you. I use about 1 large spoon of tahini to 1/2 spoon of lemon juice. This will be VERY THICK. Add water by the spoonful, and stir until the right consistency. Pour this mixture over the cooked, chopped stems. Eat on pita bread or tortillia rolled up. Very tasty.
4. Keep cooked stems in freezer and add to soups, stews, stir frys, mix in rice dishes, and I know you will think of another way.

Enjoy!